
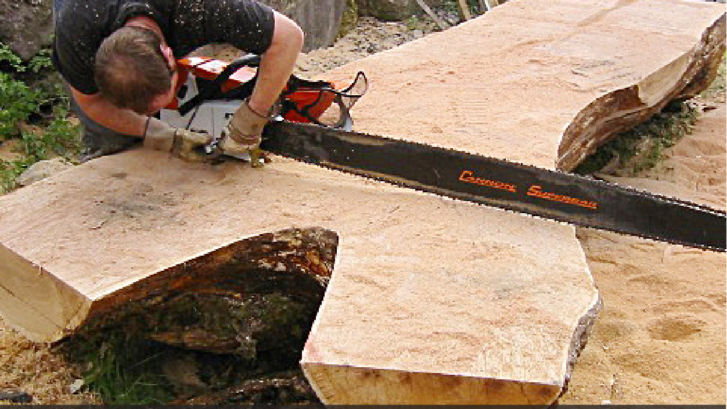
Cannon Bar Works Chainsaw Bar Maintenance Guide
Chainsaw bar maintenance is extremely important to ensure that you are getting the full life out of a new chainsaw bar. Maintenance is often overlooked and if the bar is not properly maintained, it can cause damage to the chain, decrease saw efficiency, and can be costly.
Most chainsaw bar problems are caused by incorrect chain tension, improper chain sharpening, poor operating techniques, accidents, or lack of lubrication.
Cannon Bar Maintenance Tips
Chain Tension
- Ensure the chainsaw chain is properly-tensioned and check this regularly, as the chain will stretch as the chainsaw runs. A loose chain will cause damage to the bar directly behind the bar nose and heel, as it will not pull itself straight after rounding the tip or drive sprocket. A loose chain is also prone to jumping off the bar which is not only dangerous but can cause severe damage to the bar, the chain, the drive sprocket, and the nose sprocket.
- Also ensure that you do not over tension the chain, as this can cause damage to the chainsaw’s crankshaft bearing, the chain, and the chainsaw bar sprocket nose assembly.
- How to check for proper chain tension:
- Make sure the chainsaw is turned off and the chain is cool.
- Put a pair of gloves on.
- Try sliding the chain by hand along the top of the bar. The chain should feel snug, but be able to slide freely.
- Attempt to pull a drive link away from the sprocket nose. The drive link should not be able to come away from the nose.
- Pull a drive link away from the bottom of the bar. This should be possible and the chain should snap right back into the groove when released.
Chain Sharpening
Nothing will negatively affect the life of your bar more than improperly filed or sharpened chain.
It is vitally important that the top plate angles of the right and left cutter teeth are filed to exactly the same angle which is usually about 30 degrees. Check with your chain provider to be sure because the angles can vary depending on what type of wood you are cutting and whether or not you are cross cutting or ripping with the grain.
It is just as important to make sure that the depth gauges of the chain are set at the correct depth. If the depth gauges are taken down too low then the cutter teeth become very aggressive which will cause rapid wear on the bar rails.
We highly recommend that you use a bar mounted filing guide to ensure that your chain is sharpened properly. We also recommend that you use a depth gauge tool to make sure your depth gauges are set to the proper settings.
Bar Oil and Lubrication
- Bar and Chain Oil reduces friction between the guide bar and chain, resulting in less damage to both. Always ensure that your chainsaw has bar and chain oil, and fill it up every time you refuel.
- Use high quality Bar & Chain oil. The bar and chain oil supplied by the saw manufactures is always a good choice. Never use used motor oil, it is loaded with metal particles and will cause your bar to wear out prematurely.
- Frequently clean the oil hole on the chainsaw bar and the chainsaw itself to ensure that the bar and chain are getting an adequate amount.
- Cannon’s replaceable sprocket tips are greased before they are shipped out to dealers and end-users. We recommend that you keep the sprocket tip lubricated by adding grease to the tip every time you refuel. Chainsaw grease guns are great tools for this.
- If your saw has been in storage for a while be sure to slide the chain around the bar a few times prior to starting the saw. This will pre lubricate the rails and chain groove to prevent dry starts.
Other Tips and Tricks
- Always dog your chainsaw into the tree when you are doing wedge work while falling to prevent unnecessary vibration and pressure on the chainsaw bar. We often see bars cracking at the rails a couple of inches away from where the chainsaw dogs are due to the stress that vibration causes to the bar.
- Every time you remove your chain to sharpen it, we recommend that you also clean the chainsaw bar groove and oil holes out with a groove cleaner or narrow screwdriver, and flip your chainsaw bar to ensure even wear on both sides of the bar.
- Change your drive sprocket on your saw every three chains. Do not run a used chain on a new drive sprocket and do not run a new chain on an old drive sprocket.
- Do not use your bar as a lever to pry, twist or lift the wood you are working with. To do so could cause the bar rails to crack or the bar to bend.
Regular Bar Inspection and Maintenance
Tools Required:
- Chainsaw Groove Cleaner, or Narrow Screwdriver
- Flat File, and/or Bar Rail Dresser
- Sprocket nose grease gun
- Bar rail closer
Bailey’s Online Guide Bar Maintenance Tools
Inspecting a Chainsaw Guide Bar for Wear
It is important to regularly inspect a chainsaw guide bar for any damage, excessive wear, chips, pinched rails, bends, and knife-edges. Below are some steps to follow to inspect your bar for damage and maintain it to extend the life:
- Ensure the chainsaw is turned off and remove the bar and chain from the saw.
- Clean the groove and oil holes with a chainsaw groove cleaner, or narrow screwdriver to remove any debris.
- Place the bar on edge, both top and bottom. If the bar will not stand up by itself then the rails are no longer square and will need to be repaired with a bar rail dresser.
- Check to see if the bar rails are spread apart with a straight edge. If they are then you can use a bar rail squeezer to roll them back together.

- Closely inspect the rail wear, paying special attention to the area just behind the bar nose, then turn the bar to inspect the heel. The tail, or heel, of the chainsaw guide bar will get narrow with use. Compare the width of the heel to a brand new bar, and check how shallow the rails are. If you can see that the drive links have rubbed along the bottom of the groove at the heel, it is time to replace the bar.
- File knife-edges and burrs along the rails down with a flat file or bar rail dresser to help prevent any chipping.
- Inspect the bar for bends by holding the bar level with your eye and look down it as if you were looking down a gun. If you do find any bends, inspect the rails along the area of the bend for cracks. Once there are any cracks along the rails it is time to replace the bar.
- While you are inspecting for bends, also look for pinched rails or twists in the bars. If there are any twists in the bar it is time to replace the bar.
Troubleshooting Guide
Thin and Low Rail
Cause: Chain is leaning over, or operator is forcing dull chain to cut.
Solution: Time to replace the bar. Make sure chain is not dull or leaning.
Worn Bar Rails
Cause: Rails are worn and groove is shallow.
Solution: Time to replace the bar.
Wire Edge Rails
Cause: Normal bar wear.
Solution: Use a flat-file on the edge of the bar rail to remove the wire edge and any burrs.

Chipping Where Bar Meets Sprocket Tip
Cause: Loose chain or continuous pressure to the area.
Solution: If the chipping is mostly on the tip, replace the tip and dress the bar to match the nose. If the chipping is severe on the bar, replace the bar.

Section Broken Out of Sprocket
Cause: Various causes such as irregular operation, loose chain tension, or throwing chain.
Solution: Replace the sprocket tip.
Blue Discolouration on Bar Rails or Sprocket Tip
Cause: Nose or bar rails were likely pinched, causing extra friction.
Solution: Replace tip if just along the tip, replace the bar if it is along bar rails.